Tuesday, May 5, 2009

Ident number 3....is it maybe the best one?

Now it´s Ident number 3.

I wanted to make some animation to the logo itself. In the first 2 idents I played around with the camera so there is enough of that already.

My vision was to make it come rolling against the screen and then stop.

Honestly I had no idea how to create this. I started out playing with the pbomb and the wind. That was not giving me what I really wanted. Maybe I wasn´t using it right or something.

After alot of thinking my rommates Olafur and Hannes recommended to me to use a plugin called RayFire.

Rayfire website:

After a little tutorial from my roommates I felt I could I was good enough to achieve what I wanted.

I created a plane and added a grass material on it. Then a created a sphere to be around the whole scene. For some reason I feel better working in a scene with a sphere or a box around it.

I imported the logo. Then i realized i had to create the logo blowing away from the screen and then reverse it using adobe premiere. I tried using the curve editor but didn´t get it to work.

I created a bomb and a wind and added them into the rayfire tool with the logo. After some tweaking I got the logo rolling away from the screen in a perfect way as i wanted. 

Now I had to put some lights in. I made a Target spot light and a line which followed the logo rolling away. Then I constrained the light to the line and edited the timeline so it would be above the logo at all times.

Finally I created a path for a camera coming from above and to the logo.....since I was going to reverse everything I had to have my brain in "reverse thinking mode". :)

After I rendered it and reversed it using premiere I saw a problem. The logo was way to dark in it´s final position. So I went back to 3d max and added another light  which pointed at the logo. I made it gradually decrease the light from frame 1-10 and after that none light at all.

I think this is my best Ident so far. Hopefully I will make more in the future and get more experience


Ident number 2

I put a glass material on the logo this time and was trying to create the scene a little more sporty then in the first Ident.


I added a box around it and put some images from all kind of sports on it so when a the camera goes into the scene it will show the logo surrounded by sports.

For the camera path I added a helix, starting out from the top of the box and going downwards and around the logo. I added a camera and constrained it with the the helix path.

For lighting I decided to try to make a light come from the camera. So I created a another helix exactly like the first one and added a spotlight to it.

With this I got a nice shadow from the logo casting on the walls. I think the see through glass logo looks really good.


1. logo

The first logo I created I was playing around with the cameras. I visualized the scene being dark with lights to light up the logo. I didn´t want much because I was really going for the dark look.

I decided I wanted 3 cameras.

1. camera was planned to go half round the front of the logo


First I imported the logo into the scene. I created a sphere around it for the environment. Don´t know if it mattered or not since I was going for a dark scene but i felt it would. Always good to go with the feeling :) I also put a sky image on the sphere and 2 modifiers UVW mapping and Normal so the sky would show from with in.

After that I created the lines for the cameras. Created one line and then one camera etc. When I create the camera I have to go to camera>motion>assign controller>path constrain and then pick the path.

I used a free camera.

I did this with all the cameras and then I had to align them so they would point to the logo

Then my biggest problem was how to create the lighting. I am not the biggest 3d expert but lighting I feel is the hardest part.

I started playing around with all of the lights and tried to find out a good way. Then i changed the renderer to Mental Ray renderer and that was the time something started to happen.


I started by adding a Target spot light and pointed it to the side of the logo. An area spot light was also created. But I still had something missing. So i added a few omni lights and Stuck with that.


I exported the 3 cameras and then edited them using adobe premiere. I had to take one of the camera and reverse it for a better result.

This Ident didn´t turn out as good as I wanted it. But it shows my skills in working with camera paths.  I definately need to work on my lighting technique in the future.

Logo

I know I talked about in the last post that i wanted to do a car animation with a logo on the side of the car, but yeah i decided not to do that. Instead i am going to focus on the logo itself.

I started by creating the logo.

I build a box. Then I wrote a text 2SPORT 2. I aligned the text on the box and then extruded it so it would go through the whole box.

I used boolean to extract the letters from the box so i would end up with a box with wholes in it in the shape of the logo.

Thursday, February 19, 2009

Airplane?

Hi,

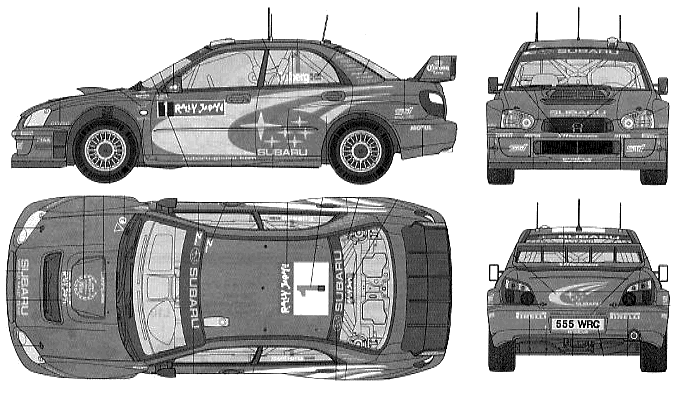
I have decided I want to create a car animation. It´s going to be a rally car driving really fast with the Channel 2 sport logo on its side or the logo will drop hard down from he sky after the car. I will be doing a storyboard for this.

To create the car I have to do a copy of a blueprint of a car.


I did a tutorial how to create an airplane using blueprints


So now I will be starting on modeling the car

Later,
Baldvin

Thursday, February 5, 2009

2nd Week

Hi, Well know we are in the second week of 3d animation. This week it has been snowing and really cold here in Chelmsford, feels like my country Iceland :) This week we learned how to make objects follow a path. This is a simple stuff. For example you make an object then you draw a line. Then select your object go to animation/constraints/path constraint. Then you will have a line coming from the object, draw that line to the path and click on it. DONE I tried to build a camera going between houses. It wasn't as amazing as i wanted it to be but I am still learnig :) One day it will be awesome.

Thursday, January 29, 2009

3D animation 2nd semester

Hi,

today I was taught the ground rules of animation. I learned how to use the timeline, how to use key frames, auto key and set key.

Then I was taught about the Mini Curve editor and curve editor. I played around in that by creating a bouncing ball and manipulating it movements in the editors.

Then I learned how to use a dummy. That will probably be a tool that I will use alot this semester :)

Finally I was to make a little animation and post it here on the blog, so here it is.